

A Practical Jenkins Continuous Integration Tutorial
This guide is a hands-on, no-fluff Jenkins tutorial. We're going to walk through everything from getting it installed to creating your first pipeline, and then push into more advanced topics like scaling with agents and locking down your workflows. My goal is to give you the practical skills you need to automate your entire development lifecycle.
Why Is Everyone Still Using Jenkins?
Before we get our hands dirty, it's worth taking a second to understand why this open-source server is still a giant in the world of DevOps. Jenkins isn't just a tool; it's a massive, extensible platform built to automate the grunt work of building, testing, and shipping software. When you embrace Continuous Integration (CI), you're creating a fast feedback loop that nips bugs in the bud, shores up code quality, and helps you release way faster.
The concept is beautifully simple. Developers push their code changes to a central repository—think GitHub or GitLab. The moment that happens, Jenkins jumps into action, automatically kicking off a build and running a battery of tests. This process catches integration issues almost immediately, saving everyone from the classic "integration hell" where days are lost trying to merge conflicting code.
If you're new to the whole idea, it's a good idea to quickly get up to speed on What Is Continuous Integration before we dive deeper into the Jenkins specifics.

This constant, automated cycle is exactly what makes Jenkins such a powerhouse for modern development teams.
The Controller-Agent Architecture
So how does Jenkins handle all this work without grinding to a halt? Through a clever controller-agent setup and a universe of plugins.
The Jenkins Controller (what we used to call the Master) is the brains of the operation. It schedules jobs, keeps track of everything, and presents the user interface. But it doesn't do the actual work. For that, it delegates tasks out to Agents (formerly known as Slaves).
This distributed approach is a game-changer for a few reasons:
- It scales. As your team and projects grow, you just add more agents to handle the load. No more bottlenecks.
- You can specialize your environments. Need to build an iOS app? Spin up a macOS agent. Working on a Windows desktop app? Fire up a Windows agent. You can create purpose-built environments for any stack.
- Things happen in parallel. With multiple agents, jobs don't have to sit in a long queue. They can run at the same time, which dramatically speeds up the feedback loop.
There's a reason Jenkins still has a massive footprint in the industry. It's projected to hold 47.13% of the global CI/CD tools market share by 2026. That’s a huge community and a testament to its flexibility.
Getting Your Environment Ready
To follow along with this tutorial, you'll need a few things set up first. Nothing too crazy, I promise.
- System Specs: You'll want a machine with at least 2 GB of RAM and 10 GB of free disk space. This is a good starting point for a simple setup.
- Java Development Kit (JDK): Jenkins runs on Java, so you absolutely need a JDK. We'll be using either JDK 11 or 17, which are the current Long-Term Support (LTS) releases.
- Docker: We're going to install Jenkins inside a Docker container. This is the cleanest and easiest way to get started, as it packages everything up neatly and avoids polluting your host machine.
My personal tip: Always start your Jenkins journey with Docker. It saves you from so many dependency headaches down the road. If you mess up a configuration, you can just toss the container and start fresh in minutes. It's the perfect low-risk sandbox for learning.
Nailing this initial setup is key. When you start with a solid foundation, you’re in a much better position to implement strong https://kluster.ai/blog/ci-cd-best-practices from day one.
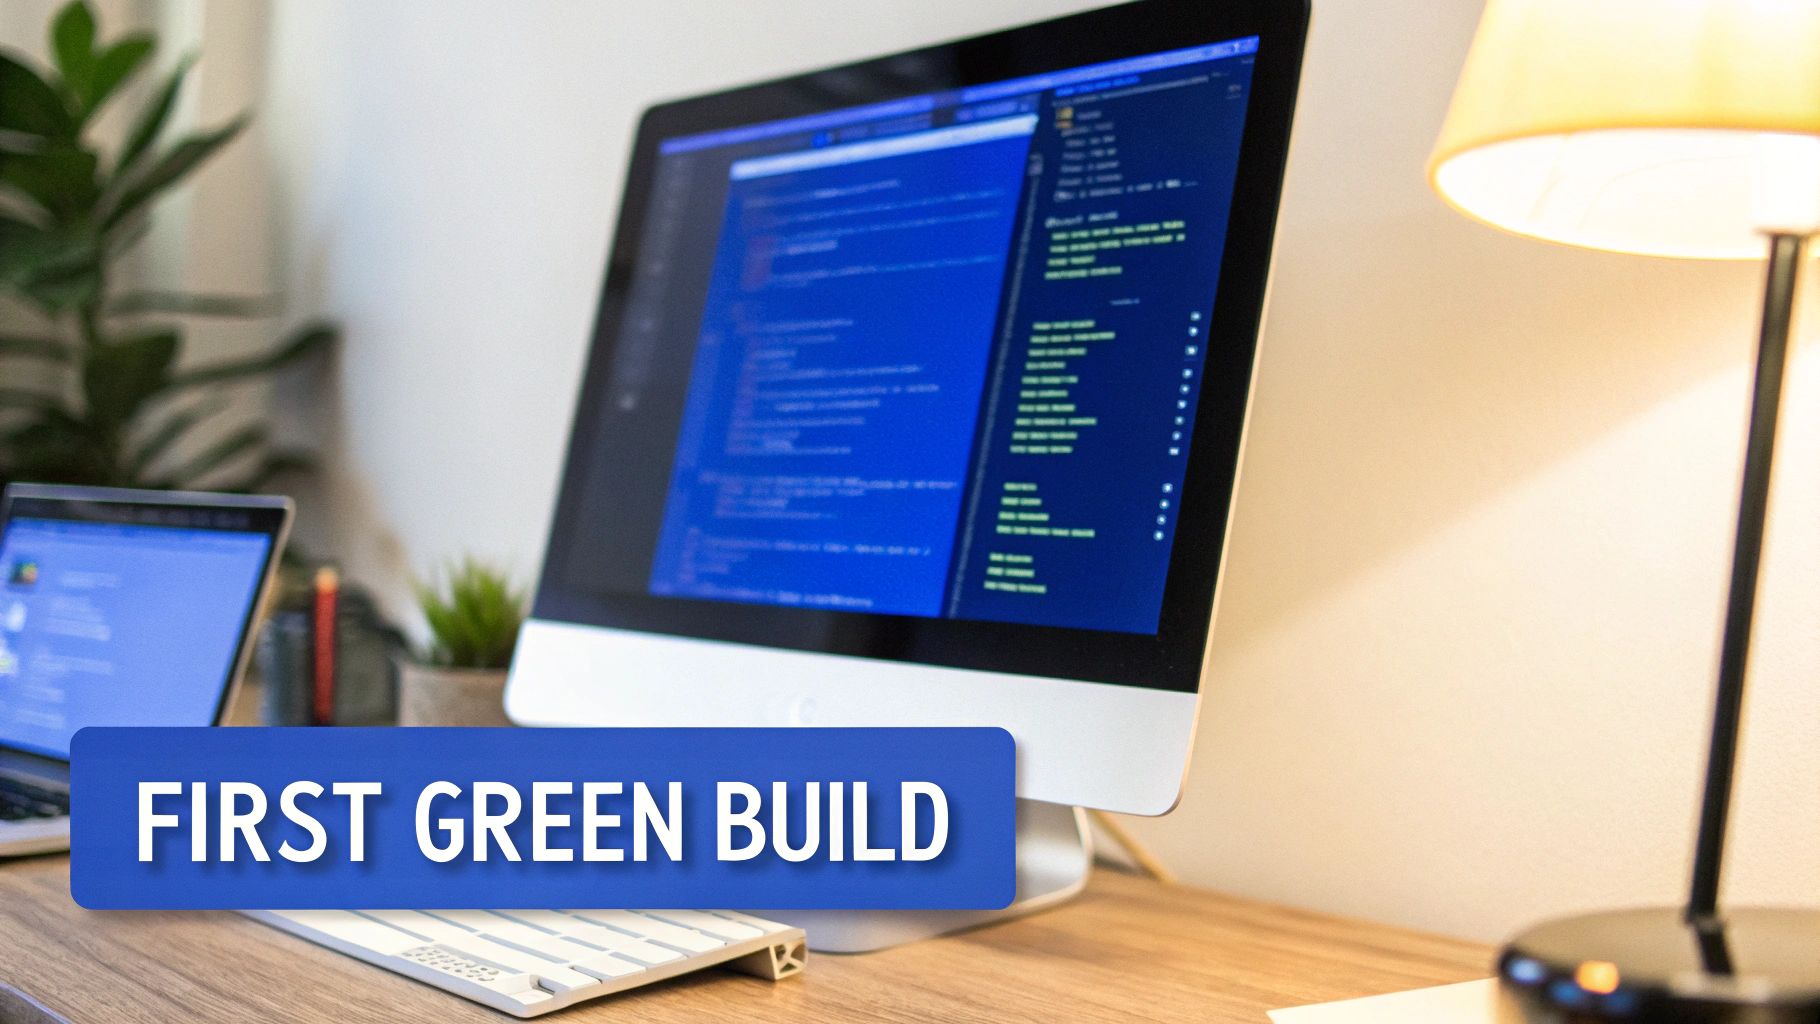
From Installation to Your First Green Build
Alright, enough with the theory. It's time to get your hands dirty and see some results. This part is all about getting that quick, satisfying win: installing Jenkins, connecting it to your code, and watching your first build turn green.
We're going to use Docker for this. Trust me on this one. It keeps the installation completely isolated from your main system, which means you can tear it down and start over in seconds if anything goes sideways. It's the perfect sandbox for learning without making a mess of your machine.
Launching Jenkins with Docker
Assuming you have Docker installed and running, kicking off a Jenkins instance is a one-liner. Pop open your terminal and run this command:
docker run -p 8080:8080 -p 50000:50000 --name jenkins-blueocean -d jenkinsci/blueocean
So, what does that command actually do?
docker run: The standard command to create and start a new container.-p 8080:8080: This maps port 8080 on your machine to port 8080 inside the container. It's how you'll access the Jenkins web interface.-p 50000:50000: This port is reserved for communication between the Jenkins controller and any agents you might add later.jenkinsci/blueocean: We're specifically using the Blue Ocean image. It comes with a much nicer, modern UI and bundles all the essential pipeline plugins right out of the box, saving us a ton of setup time.
With Jenkins now humming away in the background, we just need to grab the initial password to unlock it.
Initial Jenkins Setup and Essential Plugins
Head over to http://localhost:8080 in your browser. You'll be greeted by an "Unlock Jenkins" screen asking for an administrator password.
To find it, run this command in your terminal:
docker exec jenkins-blueocean cat /var/jenkins_home/secrets/initialAdminPassword This peeks inside the running container and spits out the password. Copy that long string of characters, paste it into the browser window, and click continue.
Next, Jenkins will offer to install plugins. Just choose "Install suggested plugins." This is the easiest path forward and includes everything we need:
- Pipeline: The heart of Jenkins, letting you define your entire build process as code.
- Git Plugin: An absolute must-have for pulling code from services like GitHub or GitLab.
- Blue Ocean: The modern UI I mentioned earlier that makes visualizing your pipelines a breeze.
Once the plugins finish installing, you'll set up your first admin user. Fill in your details, and you'll land on the main Jenkins dashboard. This is your new command center for all things automation.
A common pitfall for newcomers is getting lost in the sea of available plugins. My advice? Stick with the suggested set for now. You can always circle back to "Manage Jenkins" > "Manage Plugins" later to add more as you figure out what you need.
Freestyle vs Declarative Pipeline Quick Comparison
Before we build anything, you need to understand the two fundamental ways to create a job in Jenkins. This choice really shapes how you'll approach automation. For that, a quick comparison table is worth a thousand words.
| Feature | Freestyle Project (UI-based) | Declarative Pipeline (Code-based) |
|---|---|---|
| Configuration | Done through web forms and dropdown menus. | Defined in a text file (Jenkinsfile) checked into source control. |
| Version Control | The job configuration itself is not versioned with your code. | The Jenkinsfile is version-controlled, providing a full audit trail. |
| Reusability | Difficult to reuse logic across different projects. | Pipelines are portable and can be easily shared or templated. |
| Complexity | Best for very simple tasks or quick, one-off jobs. | Ideal for complex, multi-stage workflows and modern CI/CD. |
While Freestyle projects might seem easier at first glance, they're a dead end for any serious CI/CD work. Declarative Pipelines are the modern standard, hands down. They treat your build process like any other piece of code, which is exactly what we want. We'll be sticking with them from here on out.
Creating Your First Declarative Pipeline
Now for the fun part. We're going to create a pipeline that automatically runs every time you push new code.
First, go to GitHub and create a new public repository. Inside that new repo, create a file named Jenkinsfile (the capital 'J' is important, and no file extension). Paste this simple pipeline code into it:
pipeline { agent any
stages { stage('Build') { steps { echo 'Building the project...' } } stage('Test') { steps { echo 'Running tests...' } } }
post { success { echo 'Pipeline succeeded!' } failure { echo 'Pipeline failed.' } } } This is a basic blueprint. It defines two simple stages, 'Build' and 'Test,' and will print a different message depending on whether the pipeline succeeds or fails.
Jump back over to your Jenkins dashboard. Click "New Item," give your project a name like "my-first-pipeline," select "Pipeline," and hit OK.
On the configuration page, scroll down to the "Pipeline" section. Change the "Definition" dropdown from "Pipeline script" to "Pipeline script from SCM." This is the key step—it tells Jenkins to find our Jenkinsfile in a Git repo.
- For SCM, choose "Git."
- In Repository URL, paste the URL of the GitHub repository you just created.
- The Branch Specifier should default to
*/mainor*/master. Leave it as is.
Save the configuration. On the project page, click "Build Now" in the sidebar. Jenkins will connect to your repo, find the Jenkinsfile, and run the stages you defined.
That's it! You just got your first green build. The real magic happens now: the next time you push a change to that repository, Jenkins will automatically detect it and trigger this pipeline, completing your first true CI loop.
Mastering Pipeline as Code with the Jenkinsfile
At the heart of any modern Jenkins setup is the Jenkinsfile. This is where the magic happens. It’s a plain text file that defines your entire CI/CD process from start to finish. This is the core idea behind Pipeline as Code: your build, test, and deployment steps become a version-controlled artifact that lives right alongside your application’s source code.
Once your pipeline is code, it’s reviewable, reusable, and infinitely more powerful than clicking around in a UI. It brings your CI process into the same workflow you already use for development. You can vet pipeline changes in a pull request, see its history with git log, and even create a new branch to test out automation ideas without breaking the main build. It’s a game-changer that forces you to treat your automation with the same discipline as your application.
This shift is huge, and the numbers back it up. The market for CI tools is exploding, projected to grow from USD 8.82 billion in 2025 to USD 10.19 billion in 2026. Jenkins is leading the charge here. Between June 2021 and June 2023, the number of Pipeline jobs shot up an incredible 79%, from 27.1 million to a staggering 48.6 million jobs every month. You can dig into the specifics in the Jenkins Pipeline trends report from CloudBees.
Decoding the Declarative Pipeline Syntax
For this guide, we're going to stick with the Declarative Pipeline syntax. It’s the modern, structured way to write a Jenkinsfile, and frankly, it's much easier to learn and read. It gives you a clear, predefined structure that helps you build a robust and predictable pipeline right out of the gate.
Let's break down the essential pieces you'll see in almost every Jenkinsfile.
pipeline: This is the main wrapper for everything. Your entire pipeline definition lives inside this block.agent: This tells Jenkins where to run the pipeline.agent anyis the simplest form, telling Jenkins to just grab any available machine. You can get more specific, likeagent { docker 'node:16-alpine' }, to run your steps inside a specific Docker container.stages: This block holds one or morestagesections. Think of stages as the major phases of your workflow, like 'Build', 'Test', or 'Deploy'. They show up as distinct columns in the Jenkins UI, which is great for visibility.steps: Inside eachstage, thestepsblock is where the real work gets done. This is where you put your actual commands, whether it's a shell script (sh), a Windows batch command (bat), or any of the hundreds of steps available through Jenkins plugins.post: This is an optional block that defines actions to run after the pipeline finishes. You can set up different steps forsuccess,failure,always, or a few other conditions. It's perfect for sending notifications or cleaning up workspaces.
The real beauty of Declarative Pipeline is its structure. By giving you a clear syntax to follow, it makes your pipelines easy for anyone on the team to understand at a glance. This lowers the learning curve and makes them way easier to maintain down the road.
Crafting a Practical Jenkinsfile
Okay, enough with the theory. Let's build a Jenkinsfile that does something genuinely useful. We'll skip the basic echo commands and create a workflow for a typical Node.js project. The process usually involves installing dependencies, running a linter, executing unit tests, and finally, building the application for production.
Here’s how you’d write that out in a Jenkinsfile:
pipeline { agent any
stages { stage('Install Dependencies') { steps { sh 'npm install' } } stage('Lint Code') { steps { sh 'npm run lint' } } stage('Run Unit Tests') { steps { sh 'npm test' } } stage('Build Application') { steps { sh 'npm run build' } } }
post { always { echo 'Pipeline has finished.' } success { echo 'Build successful! Ready for deployment.' } failure { // You could send a Slack notification or email here echo 'Build failed. Please check the logs.' } } }
See how much more practical that is? Each logical step gets its own stage, which makes the pipeline's progress super clear in the Jenkins UI. If the 'Run Unit Tests' stage blows up, the pipeline stops right there, and you know exactly where to start looking—no more scrolling through one giant log file.
Enhancing Pipelines with Parameters and Conditionals
Static pipelines are a good start, but real-world automation needs to be flexible. Maybe you want to run a heavy-duty test suite only when merging into the main branch, or you need a way for a developer to manually trigger a deployment to a specific environment.
Parameterized Pipelines let you feed values into a build when it starts. You could, for instance, define a string parameter to choose a deployment target on the fly.
pipeline { agent any parameters { string(name: 'DEPLOY_ENV', defaultValue: 'staging', description: 'Environment to deploy to') } stages { stage('Deploy') { steps { echo "Deploying to ${params.DEPLOY_ENV}" // Your deployment script would go here } } } }
Conditional Logic gives you even more control. The when directive lets you run a stage only if a specific condition is true. A classic example is making sure the 'Deploy' stage only ever runs on your main production branch.
stage('Deploy to Production') { when { branch 'main' } steps { echo 'Deploying to the production environment...' } }
When you start combining these building blocks—stages, steps, parameters, and conditionals—you can turn a simple script into a smart, dynamic workflow that adapts to what you need. This is how you really unlock the power of Pipeline as Code and build an effective CI system with Jenkins.
Integrating Docker and Git for Modern Workflows
A Jenkins tutorial isn’t really complete until we talk about the two tools that define modern software development: Git and Docker. Tying them into your pipeline is what elevates it from a simple script runner to a serious, production-grade automation engine. This is where your CI process starts to look and feel like a professional workflow, ensuring things work the same way on a developer’s laptop as they do in deployment.
By using Docker, every single build runs in a squeaky-clean, isolated container. This completely stamps out the dreaded "but it works on my machine" problem by making sure the environment is always consistent. When you pair that with Git's version control, Jenkins can instantly react to every single code change, giving you feedback right when it’s most needed.
Running Pipelines Inside Docker Containers
Using Docker as a Jenkins agent is a total game-changer. Forget about installing and maintaining a dozen different tools on your Jenkins agents. Instead, you just define your entire build environment inside a Dockerfile. From there, your Jenkinsfile simply tells Jenkins which Docker image to spin up for the build.
This approach gives you some huge advantages:
- Environment Parity: The environment your CI pipeline uses is identical to the one developers use locally. This cuts down on a massive number of environment-related bugs.
- Clean Builds: Every build starts fresh in a brand-new container. You never have to worry about leftover files from a previous run causing weird, hard-to-debug failures.
- Tool Versioning: You can lock down specific versions of your tools (like Node.js, Python, or the JDK) inside your Docker image, which makes your builds predictable and repeatable, even years from now.
You can set this up directly in your Jenkinsfile with the agent directive. For a Node.js project, it’s as simple as this:
pipeline { agent { docker { image 'node:18-alpine' } } stages { stage('Run Tests') { steps { sh 'npm install' sh 'npm test' } } } }
With this in place, Jenkins will automatically pull the node:18-alpine Docker image, start a container, and run your build steps right inside it. Simple and effective.
Automating Workflows with Multibranch Pipelines
For any team juggling multiple features at once, the Multibranch Pipeline is an absolute must. Instead of manually creating a separate Jenkins job for every new feature branch, a Multibranch Pipeline scans your entire Git repository. It then automatically creates and manages jobs for every single branch that has a Jenkinsfile in it.
This means when a developer pushes a new branch, Jenkins instantly creates a pipeline just for it. When they open a pull request, Jenkins can run tests and report the status right back to GitHub or GitLab. For modern teams, mastering branches in Git is non-negotiable, and this feature makes that workflow seamless.
Honestly, setting up a Multibranch Pipeline is one of the single most impactful things you can do for your CI process. It shifts your team from being reactive to proactive, providing automated feedback on every commit, not just on merges to the main branch.
The diagram below shows the basic structure of a Jenkinsfile, breaking down how the agent, stages, and post sections fit together to build your pipeline.
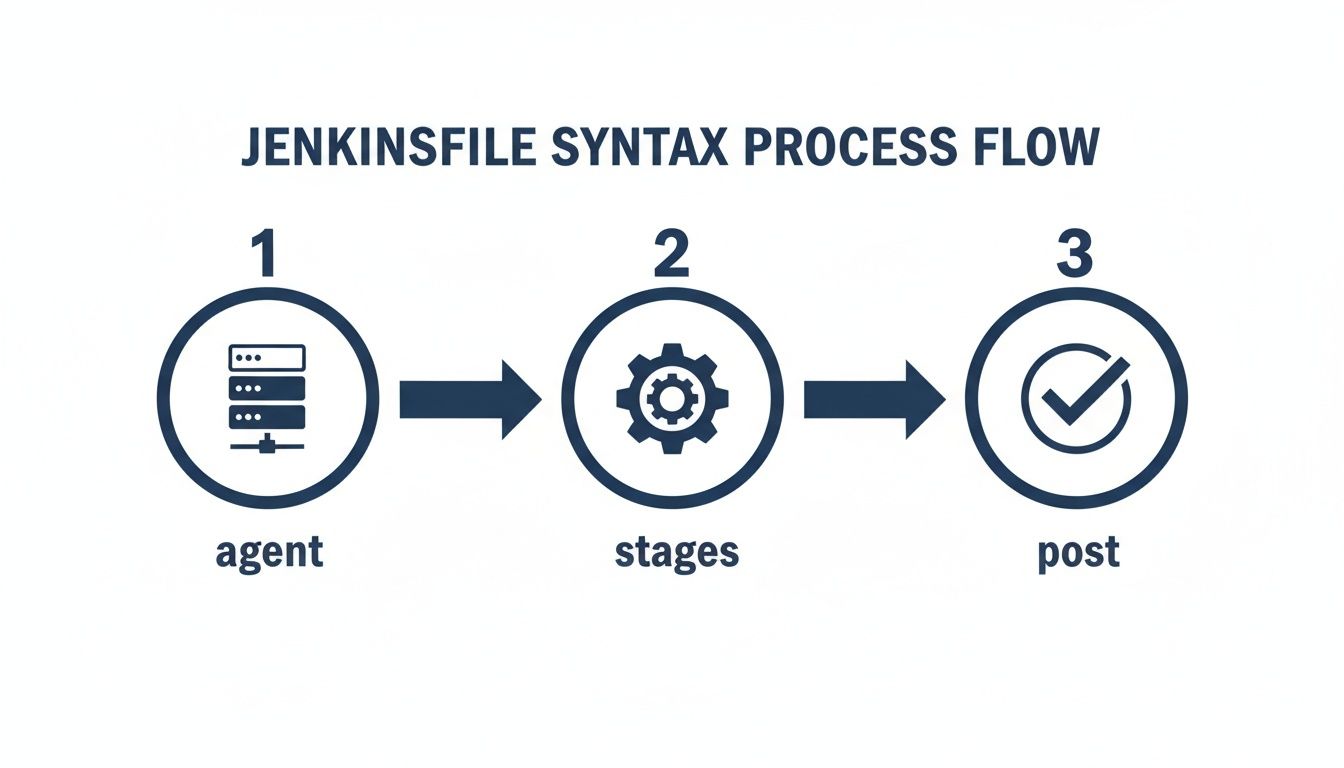
This logical flow is the backbone for all your automations, letting you define where the pipeline runs, what it does, and how it cleans up afterward.
A Real-World Example: Building and Pushing a Docker Image
Let's pull this all together with a common, real-world scenario. A typical workflow is to test an application, build a Docker image from its Dockerfile, and then push that image to a container registry like Docker Hub. This creates a portable, deployment-ready artifact of your application.
Here’s how you can script that whole process in a Jenkinsfile:
pipeline { agent any environment { DOCKER_IMAGE = "your-dockerhub-username/my-app:${env.BUILD_NUMBER}" } stages { stage('Build Docker Image') { steps { echo "Building image: ${DOCKER_IMAGE}" sh 'docker build -t ${DOCKER_IMAGE} .' } } stage('Push to Registry') { steps { withCredentials([usernamePassword(credentialsId: 'dockerhub-creds', usernameVariable: 'USER', passwordVariable: 'PASS')]) { sh 'docker login -u ${USER} -p ${PASS}' sh 'docker push ${DOCKER_IMAGE}' } } } } post { always { sh 'docker logout' } } }
This pipeline is pretty slick. It generates a unique image tag for each run using the build number, securely pulls your Docker Hub login details from the Jenkins Credentials Manager, builds the image, pushes it, and—importantly—always logs out when it's done. This is a solid, secure foundation for just about any container-based CI workflow you can think of.
Securing and Optimizing Your CI Pipeline
Getting a pipeline to run is just the beginning. A truly effective CI setup is one that's secure, reliable, and efficient—that’s what separates a quick demo from a production-ready system your team can actually trust.
Once your builds are humming along, the focus has to shift to locking down access and managing sensitive information. Without proper security, your CI server can become a gaping hole in your infrastructure, exposing everything from source code to production keys.
Implementing Role-Based Access Control
Out of the box, a fresh Jenkins installation gives any logged-in user full administrative power. This is obviously a massive security risk. Your first move should be installing the Role-based Authorization Strategy plugin. It lets you create granular permissions, making sure people only have access to the jobs and actions they absolutely need.
With this plugin, you can set up roles like:
- Developer: Can view jobs and trigger builds for their projects but can't change the pipeline configuration.
- QA Engineer: Can deploy to staging environments but only has read-only access to production deployment jobs.
- Administrator: Has full control over the Jenkins system, a role reserved for just a few key people.
This is the principle of least privilege in action, and it dramatically cuts down the risk of someone accidentally (or maliciously) messing with your critical workflows.
Managing Credentials and Secrets Securely
Hardcoding secrets like API keys, database passwords, or SSH keys directly into a Jenkinsfile is a cardinal sin of CI security. It's a disaster waiting to happen. Those secrets end up in logs and get checked into version control, creating a huge security vulnerability.
Jenkins provides the Credentials Plugin to solve this exact problem. It lets you store all that sensitive data securely inside Jenkins. Then, in your pipeline, you just reference the credential by a safe, non-secret ID.
Never, ever commit secrets to your Git repository. The Jenkins Credentials Manager should be your single source of truth for all sensitive data. Using it makes your pipelines more secure and way easier to manage when you need to rotate keys.
The screenshot below shows how modern tools can flag potential security issues right inside the code editor, long before they ever get committed.
Catching vulnerabilities this early, right in the developer's IDE, is the most efficient way to keep your codebase clean.
Shifting Security Left with In-IDE Validation
A modern CI strategy involves catching problems long before they even reach Jenkins. This is the whole idea behind the "shift-left" security model. By integrating automated checks directly into a developer's IDE, you can validate code—especially AI-generated code—for bugs and security flaws before it’s even committed. You can dive deeper into the fundamentals of a shift-left security approach to learn more.
Tools like kluster.ai run right in the editor, giving developers real-time feedback. This prevents broken builds caused by simple mistakes or flawed AI suggestions. By enforcing security policies and coding standards at the source, you ensure only high-quality, secure code ever makes it into your CI pipeline. It makes the whole process more reliable and frees up your Jenkins server to do what it does best: build and deploy solid code.
Common Jenkins Questions Answered
As you get your hands dirty with Jenkins, you're going to hit a few snags. It happens to everyone. This section is all about tackling those common questions and problems head-on, giving you quick answers so you can get back to building.
Think of this as the FAQ you wish you had from the start. We'll clear up some of the concepts that trip people up and offer some practical fixes for the issues you'll inevitably run into.
Pipeline vs. Job: What's the Difference?
This is easily one of the most common points of confusion. In the modern Jenkins world, a Pipeline is the gold standard. It's how you define your entire build, test, and deploy process as code inside a Jenkinsfile. This approach is flexible, easy to version control, and essential for any serious CI/CD setup.
A Job, on the other hand, is a much broader term. A Pipeline is actually just one type of job. You'll also see older types, like Freestyle projects, which are also considered jobs. People often use the terms interchangeably, but when an experienced developer talks about building a "pipeline," they're almost always referring to a code-based workflow defined in a Jenkinsfile.
My advice? Forget about Freestyle jobs and commit to the Pipeline as Code model from day one. It will save you countless headaches and make your automation vastly more powerful and easier to maintain.
How Do I Pass Information Between Stages?
Another classic challenge is sharing data between stages. Let's say you generate a version number in your 'Build' stage and need to use that exact same number later in your 'Deploy' stage. How do you pass it along?
The cleanest way to do this is to define a variable at the top level of your pipeline, outside of any specific stage. This puts the variable in the pipeline's global scope, making it accessible everywhere.
Here’s a quick look at how it works:
def appVersion
pipeline { agent any stages { stage('Set Version') { steps { script { appVersion = "1.2.${env.BUILD_NUMBER}" } echo "Application version set to: ${appVersion}" } } stage('Use Version') { steps { echo "Now using version ${appVersion} for deployment." } } } }
Because we declared appVersion before the stages block, any stage can read from it or write to it. Simple and effective.
Common Troubleshooting Scenarios
Even the most carefully planned pipelines will fail. It's a fact of life. Becoming a good Jenkins user means getting good at debugging. When a build turns red, your first port of call should always be the Console Output for that run. It contains a detailed log of every command Jenkins executed and is almost always where you'll find the error message that cracks the case.
Still, some issues pop up more than others. Here’s a quick rundown of common problems and where to start looking for a fix.
Common Troubleshooting Scenarios
Quick solutions for frequent Jenkins pipeline errors and issues.
| Symptom | Potential Cause | Quick Fix / Area to Investigate |
|---|---|---|
| "Permission denied" error | The user running the Jenkins agent lacks the file permissions to execute a script or access a directory. | Check which user the Jenkins agent is running as on the machine. Make sure it has execute permissions (chmod +x) on your scripts. |
| "Command not found" error | A required tool (like npm, Docker, or mvn) isn't installed on the agent or isn't available in the system's PATH. | SSH into the agent and verify the tool is installed and in the PATH. If you're using a Docker agent, update your Dockerfile to include it. |
| Build hangs indefinitely | A process is stuck waiting for user input, or a network issue is blocking a resource from downloading. | Scan the console log for any interactive prompts. From the agent, check network connectivity to external services like artifact repositories or package managers. |
Remember, a failed build isn't a disaster—it's just feedback. Every red dot in your build history is an opportunity to make your automation tougher and more reliable. Adopting that mindset is the real key to mastering Jenkins.
Ready to eliminate bugs before they even reach your pipeline? kluster.ai integrates directly into your IDE to provide real-time, intelligent code review for AI-generated code. Catch hallucinations, security flaws, and logic errors in seconds, ensuring only production-ready code gets committed. Start for free and cut your review time in half at https://kluster.ai.